
Chunky bead necklace tutorial
Posted by Shannon on Jun 8th 2017
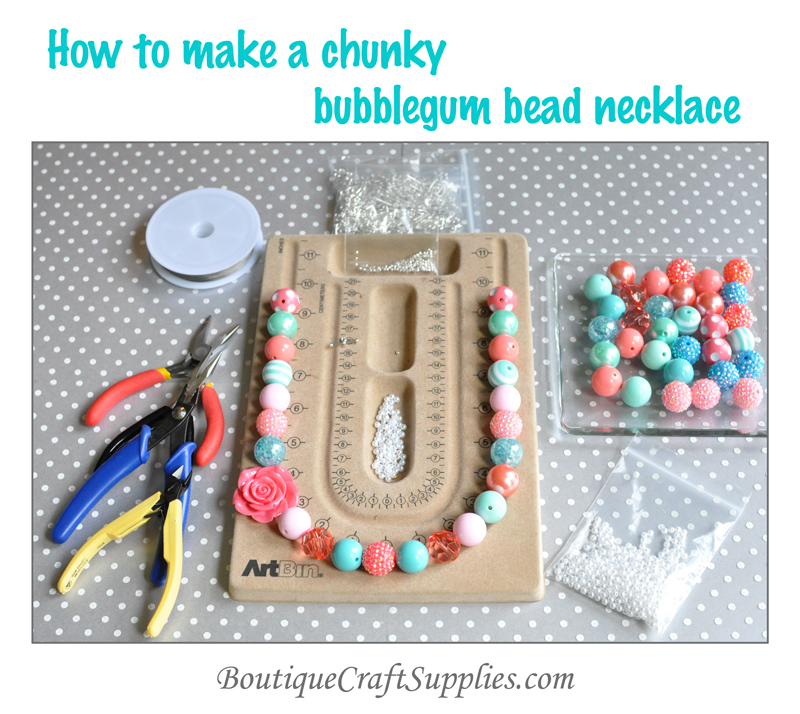
Welcome to the Boutique Craft Supplies blog! This tutorial will show you step-by-step how to make a chunky bubblegum bead necklace for kids, baby, or yourself.
Supplies needed to make this necklace:
20mm bubblegum beads, also known as bubble gum ball, gumball, or chunky beads. These beads are made of acrylic or resin, i.e. plastic. For this tutorial I've used my Summer Splash coral and aqua bead kit, with additional coral rose rhinestones, and a 42mm coral resin flower bead.
Spacer beads: I've used my 4mm white acrylic pearl spacer beads.
Findings, aka hardware: I've used my chunky necklace hardware kit which includes silver colored wire, crimp beads, and heart toggles clasps.
Tools: You actually only need a pair of wire cutters and a pair of crimp pliers. I show two needle nose pliers in the pic, but you don't need these unless you decide to use jump rings. In this tutorial we will crimp to the clasp instead of to a jump ring.
Tools and bead board can be found at any local craft store or, of course, Amazon.
Here are the exact crimp pliers I have on Amazon, they have lasted me for years. Here are my wire cutters. I use a pair of good quality wire cutters because I want a sharp, close cut.
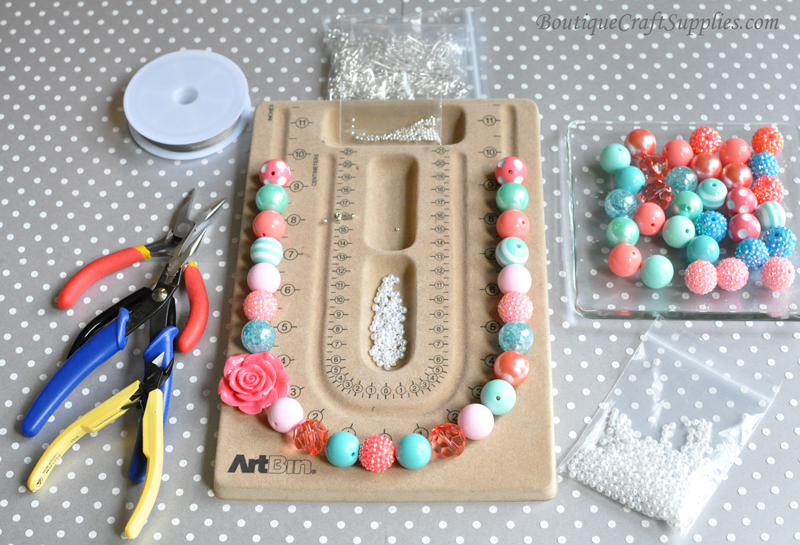
Necklace design tips:
So after you have all your supplies gathered up, you want to start laying out your necklace design. Sometimes I start a design by laying out the focal beads first. I usually use a rhinestone in the center of the necklace. If using a flower focal I place it off to the side and use two extra fill-in beads on the opposite side to keep the rest of the design symmetrical (in the pic, it's the aqua and coral pearl on the right that fill-in). I always match my beads on each side of the necklace but of course, you don't have to, sometimes it's fun to have a more random mix. I try not to use too many different colors because the design can get a little scattered and overwhelming if you mix more than 4 or 5 different shades (unless you're doing a full rainbow design). I also use solid colored beads in between patterns and specialty beads to keep the design cohesive and not too busy. In my opinion a little repetition is good, so don't try to use every different style and color of bead in your bead box in one necklace unless you're some kind of jewelry-design phenom lol.
A note on crimp beads:
The first and most important part of your necklace is the crimp bead. It's what holds your whole necklace together. There are a lot of garbage crimp beads and tubes out there. It's especially difficult to find good quality plated crimps. Sterling silver and gold-filled crimps are much easier to use because the metal is a little stiffer so they hold their shape better (but they are much more expensive). I have only found one good quality plated crimp and these are the ones I sell in my shop. If you are using a crimp that gives out completely when you press it with your pliers, smashes totally flat, and will not fold nicely keeping your wire separated (like I describe below) throw it away and don't torture yourself. It's not your fault, it's the crimp lol. It's very important for your crimp bead to crease cleanly, keeping each end of the wire separate and immobile with-in the crimp. And the crimp must then crease a second time making the grip on the wire very strong. If this doesn't happen, it will not be long before the crimp breaks and all your beads go flying.
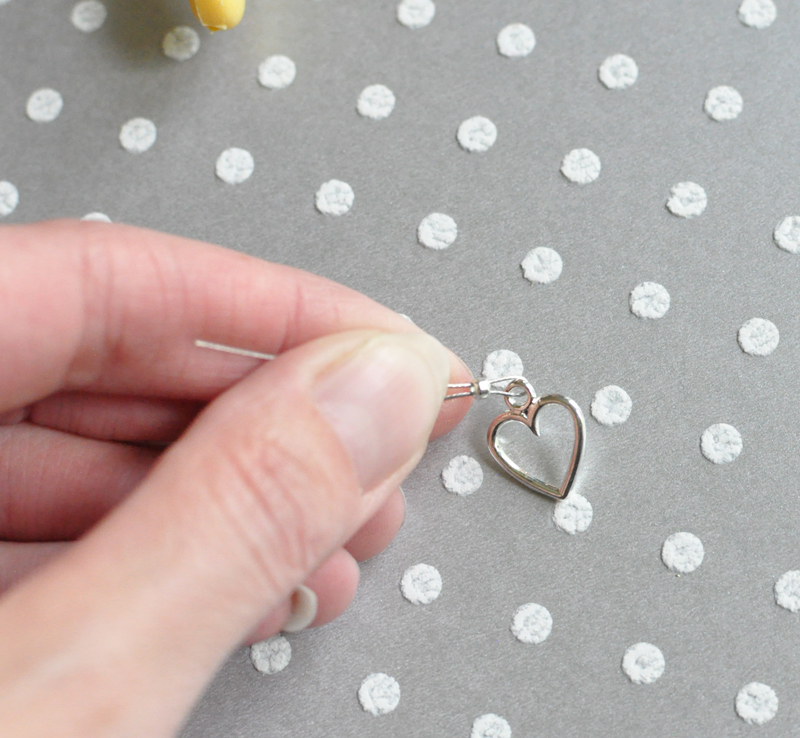
Start building your necklace:
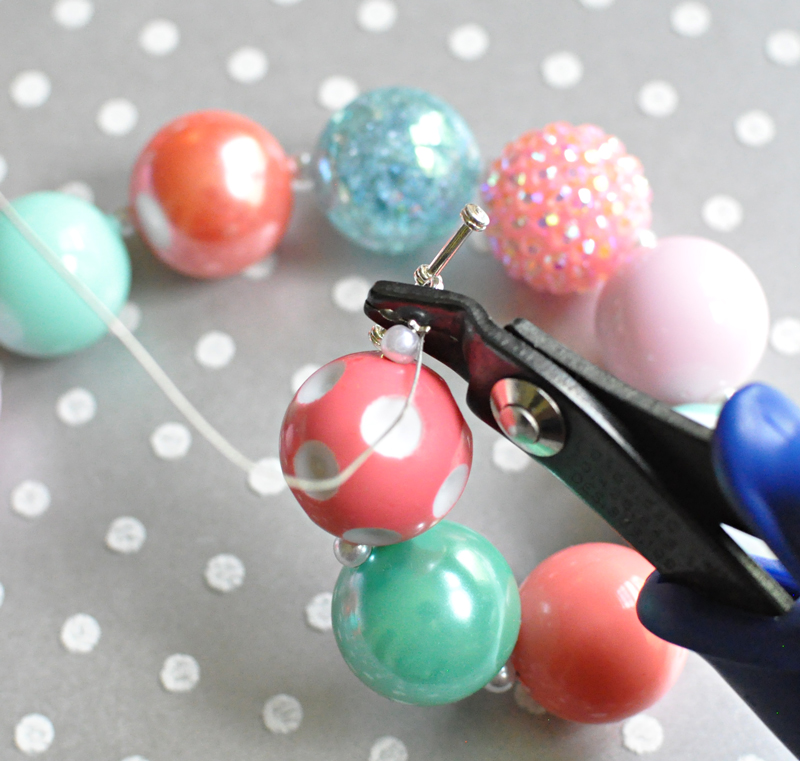
First run your wire through the crimp bead, through the hole in your toggle clasp, and then back through the crimp bead (as shown above). Use your thumb and fingers to keep each wire end separated to each side of the crimp bead. To get the best and strongest crimp you want to make sure your wire is NOT crossed inside the crimp bead. Take hold of your crimp bead with the crimp pliers and try to look inside making sure the wire is not twisted or crossed. Use the first notch (closest to the handle) in your crimp pliers and press down on the crimp bead tightly.
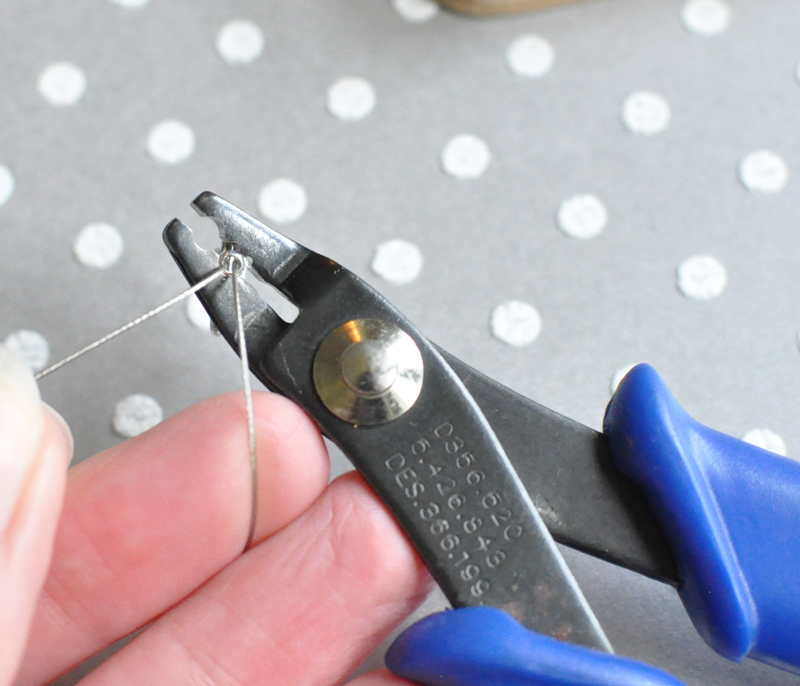
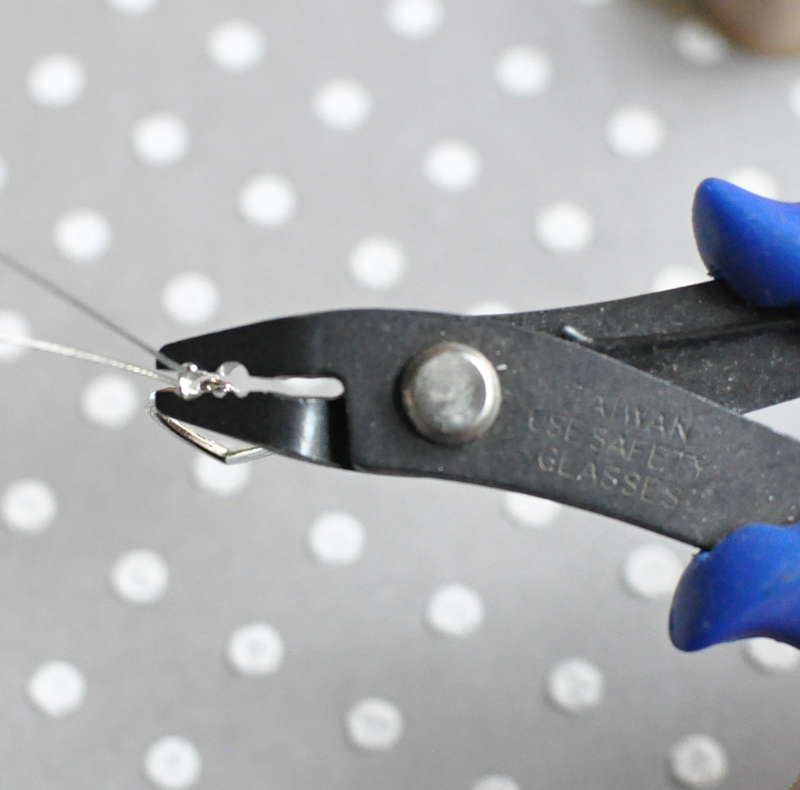
Turn your crimp bead on its side and place it in the second notch in the pliers, so you can fold the flatten sides together. Press together firmly. Resist the urge to press down on your crimp multiple times because if the bead moves at all you'll end up with a scraggly looking bead with multiple dents in it.
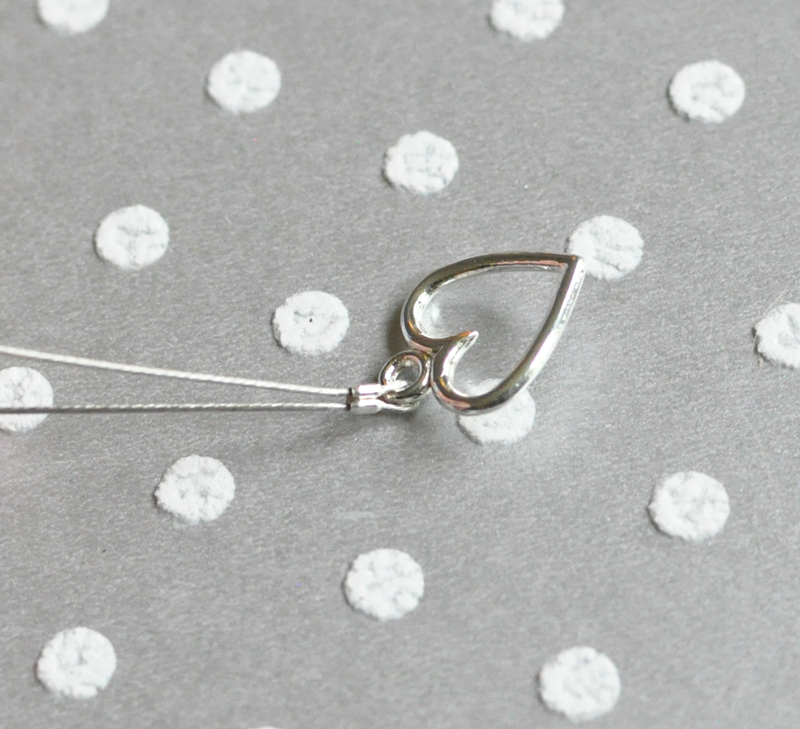
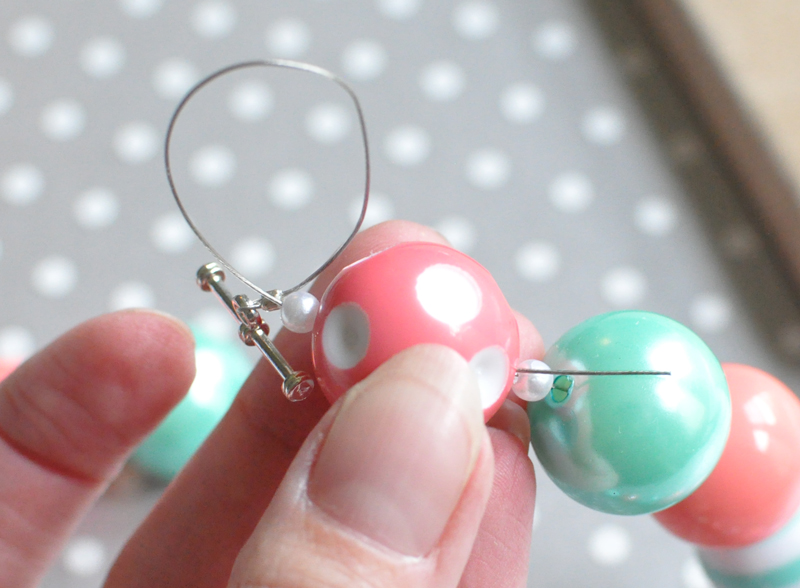
This is what your finished crimp bead should look like. Notice how each wire end is separate and not wrapped around itself.
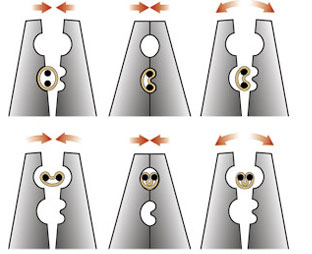
Here is an excellent illustration from Griffen.de that shows you how the crimp bead is placed in the plier and folded over on itself. The black dots are where your wire is inside the bead.
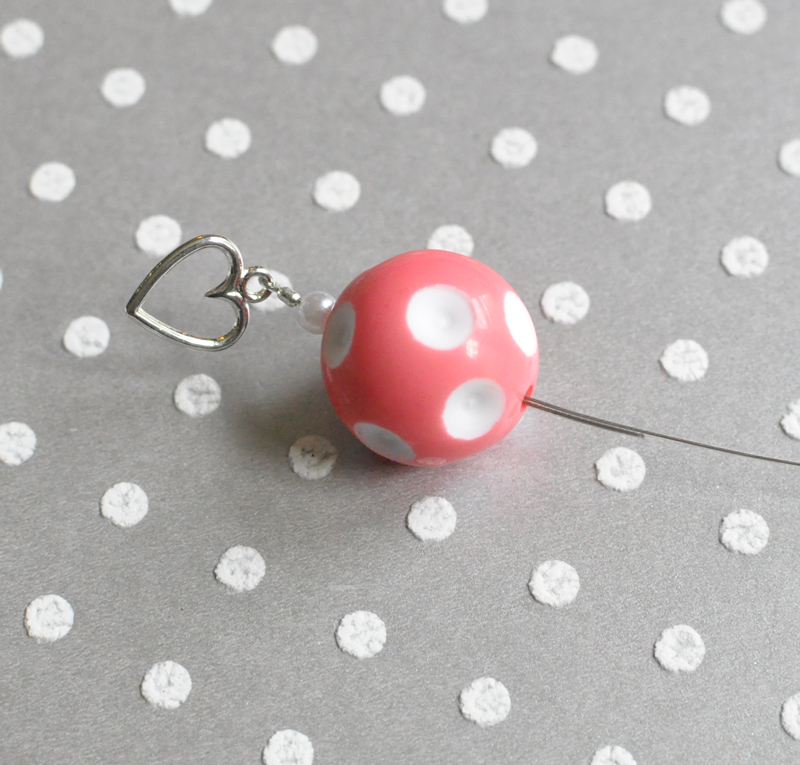
Before you trim the wire end, string a spacer bead and a 20mm bead over both pieces of your wire. Cut the end piece of wire flush with your 20mm bead. Now continue stringing your beads, using a spacer bead between each large bead, including the flower or any other focal beads you are using in your design. Spacer beads help the necklace drape nicely without showing any wire gaps between big beads.

Here is my necklace with all beads and spacers. Don't forget to put that very last spacer bead on.

Now we just repeat the processes from the beginning. String your crimp bead on, then the other end of your toggle clasp, and run your wire end back through the crimp. Make sure your necklace is lying curved on the table, if you hold it straight up in the air you might tighten your wire too much, stiffening your necklace and losing the nice drape. Leave a little room in your wire loop for your toggle to move around too. Many necklaces break because of over tightened wire or crimps that were placed too close to the bead or clasp.
Crimp your crimp bead exactly as before. It's a little trickier on this side keeping the wire separate in the crimp, so take your time. You might need to pull your wire tighter a couple of times while you're adjusting the crimp bead or wire placement.
Run the end of your wire back through the first spacer and one 20mm bead, then cut your wire end flush.
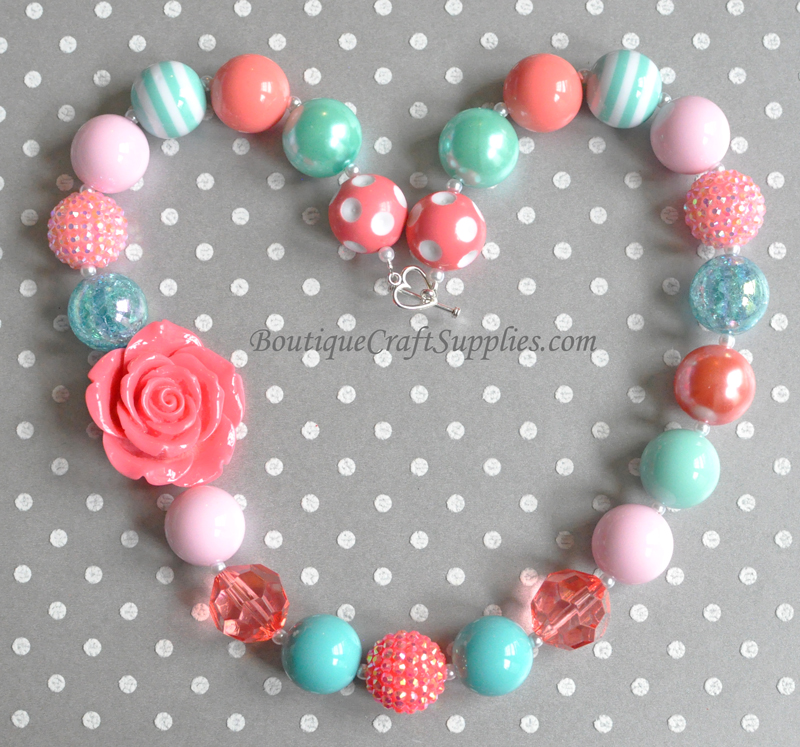
Ta-da you're done! Enjoy your new chunky bead necklace. :)